Optimize the registration process with integrations
LEARNING GOAL: knowing how I can streamline the registration process by using integrations.
Integrations have been created to make life easier. So it would be a shame to not use any during the registration process. There are several different software tools you can integrate with WebinarGeek. Let’s have a look at some of them:
Hubspot
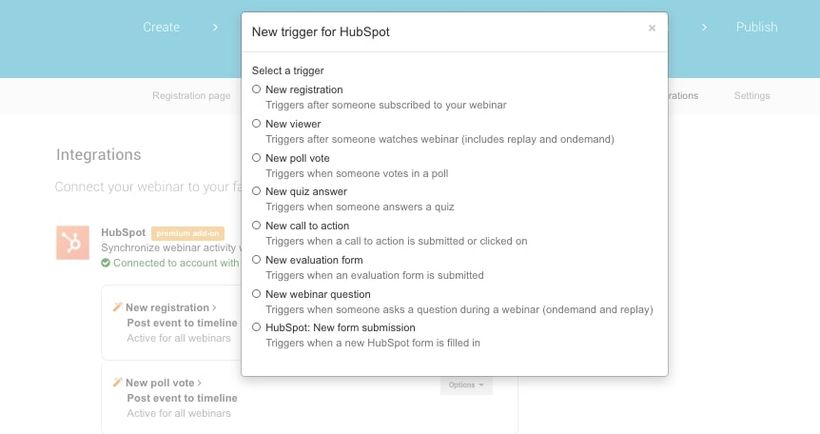
WebinarGeek offers the option to send data that is processed in your webinar to the Hubspot CRM system. And that’s handy when you want to follow up on leads. You can access information about participants directly in Hubspot, which enables you to easily segment the participants, based on, for example, the latest date on which your contact has watched a webinar. Then create a suiting email campaign and send the emails directly to the participants. Couldn’t be easier!
Besides participant data, Hubspot also receives information about viewer behavior, interactions, and evaluation forms. In this way, all your webinar participant data is stored in one place.
ActiveCampaign
Emails, such as the confirmation email and replay emails, can be sent outside of WebinarGeek. That’s where the ActiveCampaign integration comes into play. With this integration viewers, non-viewers and registrants are automatically added to your mailing list.
The benefit of this is that you can easily build email campaigns based on your participants’ viewing behavior. But of course, you can also send all WebinarGeek emails through ActiveCampaign. In the replay email, for example, the replay links are directly transferred to ActiveCampaign, so you don’t have to copy these yourself.
Facebook Pixel
Facebook Pixel makes remarketing, optimizing, and conversion tracking of your Facebook ads easy. The WebinarGeek integration helps you to easily make ads for your next webinar. It also offers the possibility to measure conversion from visitors to registrations for your webinar.
Setting up Facebook Pixel on your website can be quite challenging. Because we want to make it as simple as possible, you don’t have to worry about codes and settings. The link with WebinarGeek makes sure that Facebook Pixel is automatically shown on your public pages. All you have to do is set up the link. WebinarGeek does the rest.
Would you like to know which other integrations can be linked with WebinarGeek? Have a look at our Integrations page. Can’t find your tool on the list? Maybe you can use Zapier to link your integration to WebinarGeek.
Zapier
Zapier is a tool that lets you link thousands of other applications with WebinarGeek. Chances are that your favorite software can be found here as well. Would you like to add registrants directly to your mailing list, but do you not use ActiveCampaign or Mailchimp? Then search Zapier’s application list for your mailing system.
In chapter 4, we already talked about different payment tools besides Mollie. Through Zapier you can link tools such as PayPal or Stripe with WebinarGeek. In this way, you can organize a paid webinar using your favorite payment tool. Would you like to learn more about this? Have a look at our [English spoken webinar], in which we explain how to link integrations like Stripe and PayPal.
Linking WebinarGeek and Zapier is very easy. All you need are a Zapier account and a WebinarGeek account with available marketing integrations.
Integrations are also very easy to use, they can save you a lot of time and make sure that you can automate a big part of the registration process. Check which software you use and see how you can link this with WebinarGeek to take your registration process to a whole new level.
What have I learned?
What the benefits of integrations are in WebinarGeek
What I can do with WebinarGeek integrations
What I can do with Zapier
Next courses

Moderating a webinar from A to Z
Add moderators and master the live chat with our step-by-step guide.

How to moderate a webinar
Dive into the world of webinar moderation with our quick guide! Discover the crucial role of a Chat Moderator and learn how to enhance your webinar experience.
Create a Live Webinar
Take your live webinars to the next level with our step-by-step checklist!

3 Tried and Tested Webinar Strategies
In this video, we delve into the world of webinars with WebinarGeek, unveiling three proven strategies that guarantee success. Boost your success today!

Optimize your webcam with OBS part 2
Elevate your webcam image quality with OBS! Learn to tweak settings like white balance, gamma, and more for a professional look.

Optimize your webcam with OBS - part 1
Enhance your webinar's visual appeal! Learn to optimize your webcam image using OBS. Brightness, contrast, saturation, sharpness—master these settings for a captivating presentation.
Time saving features
Discover all the automations and shortcuts you should be using

Email and webinar marketing by MailBlue
MailBlue, official ActiveCampaign reseller, explores the connection between webinars and email marketing.

10 tactics for more registrations by Onomondo
In this webinar, we dive into the important role of webinars in sharing valuable insights.
Create an Automated Webinar
Discover the power of automated webinars with our step-by-step checklist!