Product update: AWeber Integration
Remco
24 March 2016 - 2 min

Heads up guys, another completely new integration has now been added to WebinarGeek. Today it’s Awebers turn, this integration came in second in our poll about which integration should be next. Starting today, it’s possible to connect your mailing lists in AWeber with WebinarGeek.
What does integrating AWeber do in WebinarGeek?
Integrating Aweber with WebinarGeek allows you to keep your mailing lists up-to-date at all times. After planning your webinar, you usually start promoting it. Obviously, your list is the first place to promote a webinar, but you can also do this through social media or other means. People that are interested will be triggered to subscribe, some of which will not be on your mailing list already. The data from these people will be auto-added on an Aweber mailing list of your choice. This will save you a bunch of time and effort!
How to connect AWeber to your WebinarGeek account?
Go to your account in WebinarGeek, and select the option ‘integrations’ from the right-hand menu
Next, click on the button 'Connect AWeber'.
In the next screen, fill in all relevant account details from your Aweber account and click 'Allow'.
Next, click on Connect Aweber and select a mailing list of your choice (usually your standard list).
Starting today, all registrations with Aweber can be auto-synced! It’s even possible to create and select a separate list for each webinar, or completely turn off this feature.
Related articles
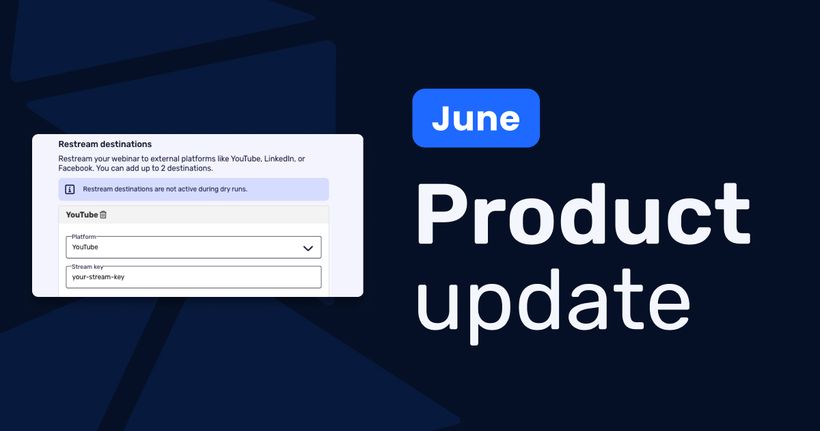
Product Update: New Calls to Action, Restreaming and more
Discover WebinarGeek’s latest product updates, including improved Calls to Action, external conversion tracking, editable speaker notes, and webinar restreaming.
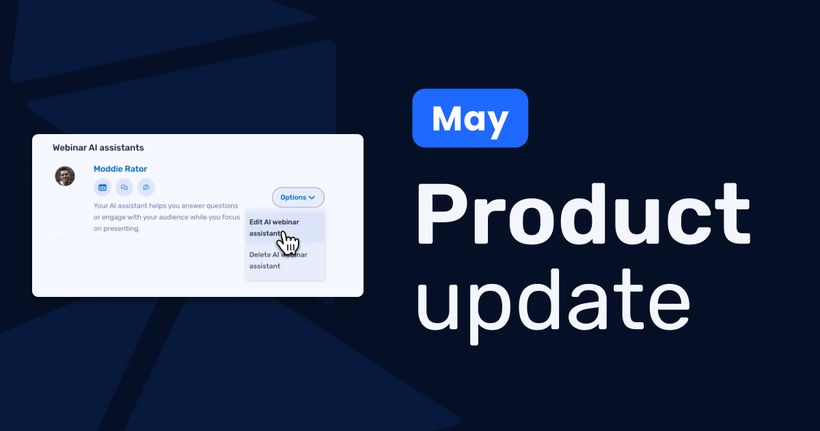
Product Update: AI Assistant, live slide upload, automated webinar time range and more
Discover the latest WebinarGeek updates, including the AI Assistant, downloadable files in calls to action, live slide uploads and time ranges for automated webinars.
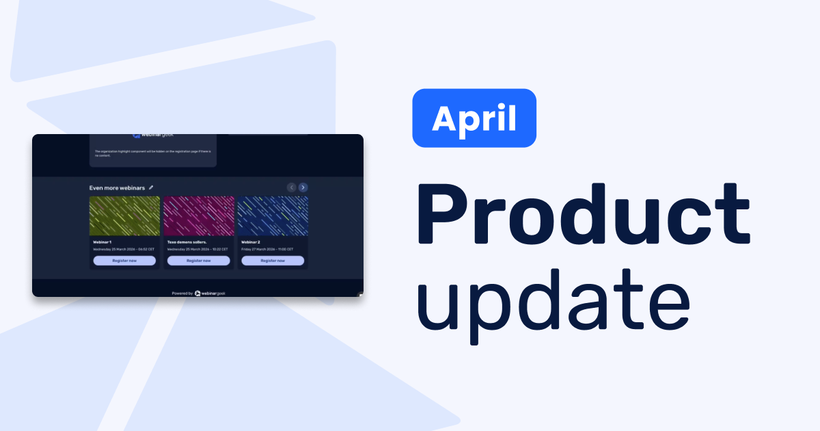
Product Update: Channels, audio notifications, captions and more
Discover WebinarGeek’s April product updates, including connected channels and registration pages, team reminder emails, audio notifications, scheduled Q&A, and captions.